Creating a Microsoft Azure Account
Before you can explore the exciting world of Azure DevOps, you’ll need a Microsoft Azure account. Don’t worry — it’s free to get started, and setting it up is easier than you think. This guide will walk you through every step.
Why You Need an Azure Account
Imagine you’re building a house — you’ll need land, tools, and a team. Azure is like that piece of land in the cloud, giving you space and tools to build applications, host services, run virtual machines, and much more.
With an Azure account, you get access to dozens of cloud services — including Azure DevOps, which helps you plan, develop, test, and deploy code as a team.
- $100 in free credits for 365 days
- Free access to popular services for 12 months
- 55+ services always free (including Azure DevOps)
Let’s Get Started — Step-by-Step
Setting up your account will only take a few minutes. Just follow these steps:
Step 1: Go to the Azure Website
Open your browser and go to azure.microsoft.com. Once you’re there, click on the big “Start free” button at the top right corner of the page.
This button takes you to the Azure sign-up form where you’ll begin your journey.

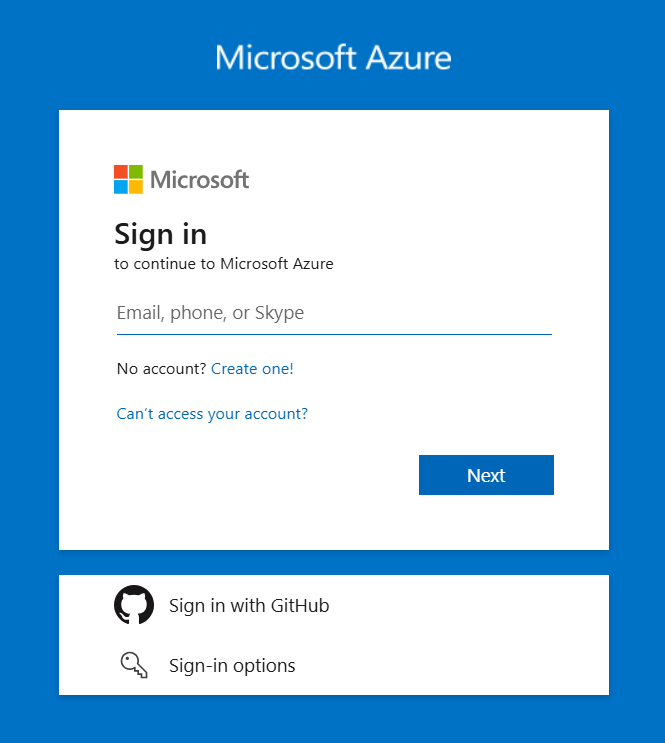
Start your free journey on the Azure sign-up page.
Step 2: Sign in with Your Microsoft Account
Already have a Microsoft account (like Outlook, Hotmail, Xbox, Skype)? Perfect! Use it to sign in.
If not, no worries. Click “Create one!” and you’ll be guided through setting up a new account. It’s quick and free — just your name, email, and a password.
This Microsoft account will be your key to accessing not just Azure, but many other Microsoft services too.
Step 3: Enter Your Details
Now it’s time to provide some basic information. You’ll be asked to:
- Confirm your name and region
- Verify your phone number (via text or call)
- Add a credit/debit card (just for verification — you won’t be charged)
This step helps Microsoft make sure that you’re a real user and not a bot. They also ensure each person only gets one free trial.

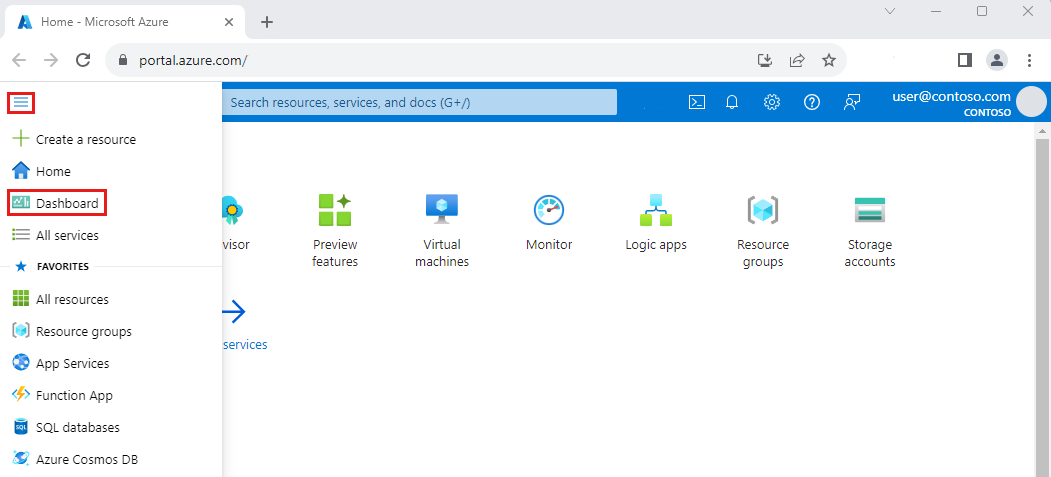
Welcome to your Azure Portal — your cloud control center.
Step 4: Explore the Azure Portal
Once your account is created and verified, you’ll be taken to the Azure Portal.
This is your cloud dashboard — where you’ll create resources, manage services, and monitor projects. It may look overwhelming at first, but don’t worry. You’ll get comfortable with it over time.
Take a few minutes to explore the menus, search bar, and pinned services. Try clicking on “All Services” to see what’s available!
Helpful Tips for Beginners
- Bookmark the Azure Portal: https://portal.azure.com for quick access.
- Stay safe: Always monitor your usage under "Cost Management + Billing" to avoid surprises.
- Learn by doing: Try creating a resource like a storage account or test virtual machine.
- Use Microsoft Learn: Get free step-by-step labs and learning paths at Microsoft Learn.
What's Next?
Congratulations! 🎉 You now have your own Microsoft Azure account — your gateway to building, testing, and deploying real-world apps in the cloud.
In the next step, we’ll guide you through setting up your very own **Azure DevOps organization**, where you can start managing projects, creating repositories, and automating deployments.